
What is the subject matter of this blog?
This alternative succinctly introduces the main focus of the blog post, which is navigating the realm of AWS security compliance using AWS Config Rules and SSM Automation.
Restructured Points:
AWS Config rules provide the ability to determine whether a particular resource adheres to compliance standards. It’s crucial to recognize that while they can detect discrepancies, AWS Config rules lack the capability to directly resolve these issues.
The SSM Automation feature is designed to autonomously address specific resources within the AWS environment, facilitating remediation without manual intervention.
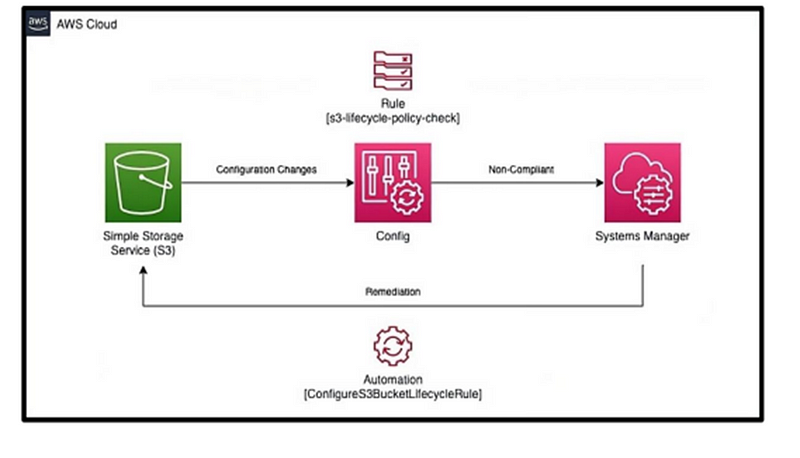
To achieve automated remediation, it’s essential to integrate SSM automation with Config rules.
Methodical instruction:
Step 1: Launch AWS Config by logging into the AWS console.
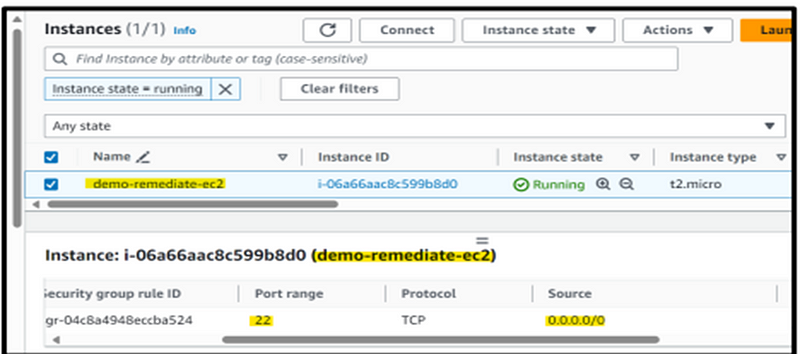
Step 2 : For illustration, start the process of creating an EC2 instance called “demo-remediate-ec2” and a Security Group with the same name. Configure the Security Group to allow public SSH access.
Observe: Prior to proceeding, it’s imperative to highlight that the automation process can be conducted either through a service role or by assuming a designated role. Consequently, creating an IAM role with the requisite permissions is indispensable. This measure ensures that the automation capability has the power to change the security group rule that has been assigned to it.”
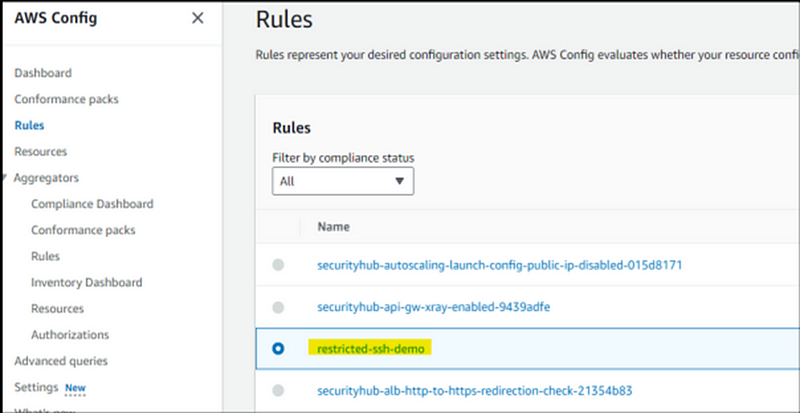
Step 3: To pinpoint non-compliant resources, you must establish configuration rules. Navigate to the AWS console, input ‘Config’ into the search bar, then proceed to the ‘Rules’ section. Click on ‘Add Rule’ to initiate the process.
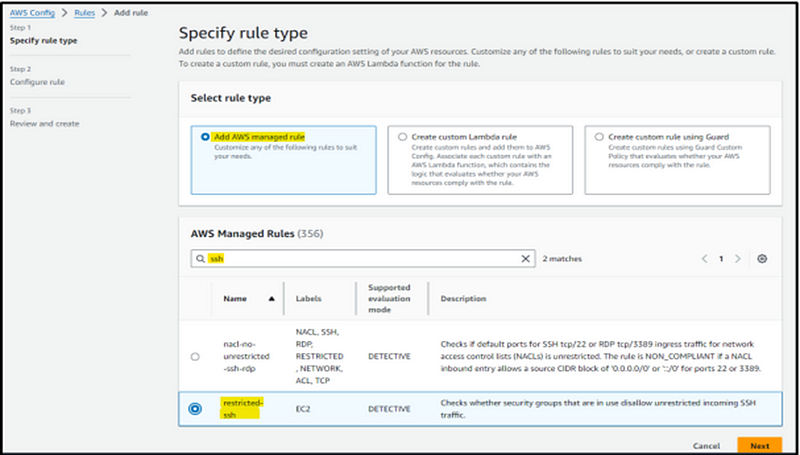
Step 4: Select ‘Add AWS Managed Rules’ or ‘Create Custom Lambda Rule’. In our case, the scenario corresponds to AWS-managed rules, specifically the ‘restricted-ssh’ rule
Step 5: Retain the default settings for the remaining configuration, then proceed by selecting “Next.” Provide a name for the rule and complete the process by choosing “Create the rule.”
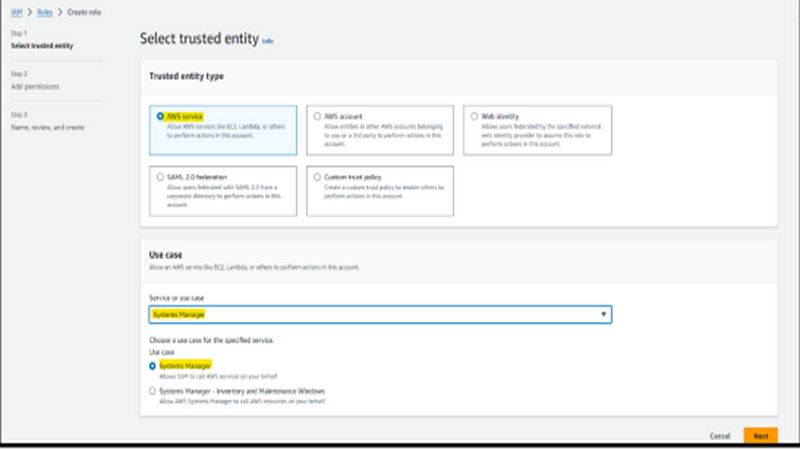
Step 6: Navigate to the IAM Console and click on ‘Roles’ to create a new IAM role. When selecting the Trusted Entity Type, opt for ‘AWS Service’. For the use cases, choose ‘Systems Manager’, as it’s crucial for automation capabilities within Systems Manager. Continue by clicking ‘Next’.
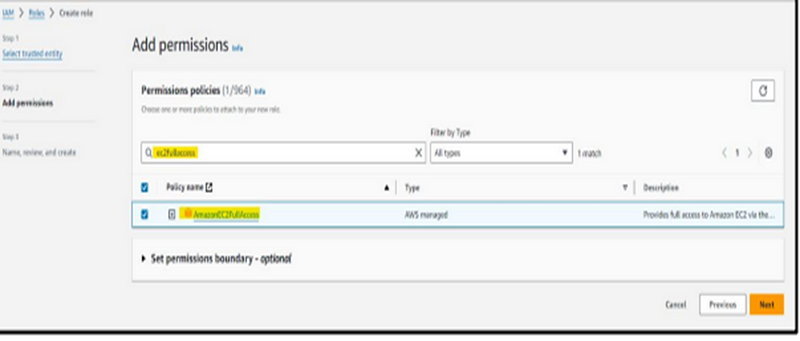
Step 7: It’s essential to incorporate specific permissions based on the desired level of configuration or automation. To restrict SSH access, we will allocate the necessary permissions to the IAM role before advancing to the subsequent step.
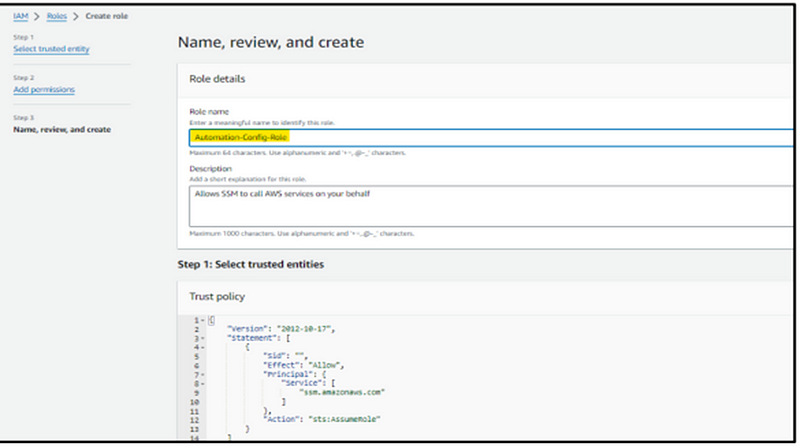
Step 8: Once completed, provide the name of the role and proceed to create the role.
Step 9: After revisiting the Config rules, refresh the page. At this juncture, we can observe that the Config rule has detected non-compliant resources.
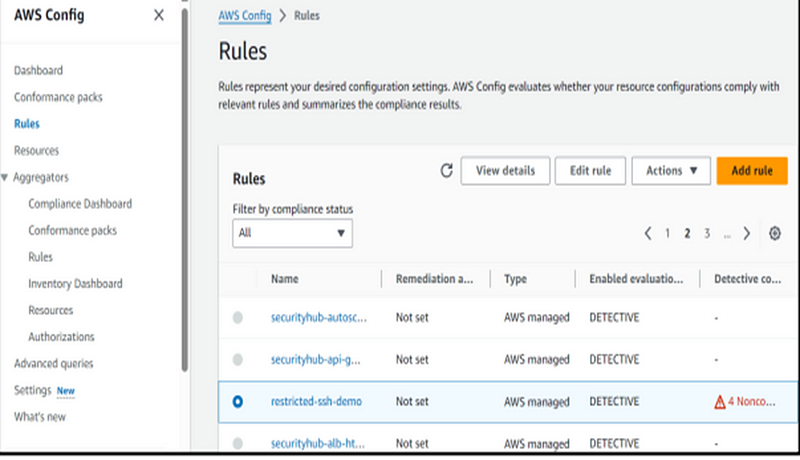
Step 10: The identified non-compliant resources are the security group with an ID ending in ‘92ca,’ which we set up for demonstration purposes.

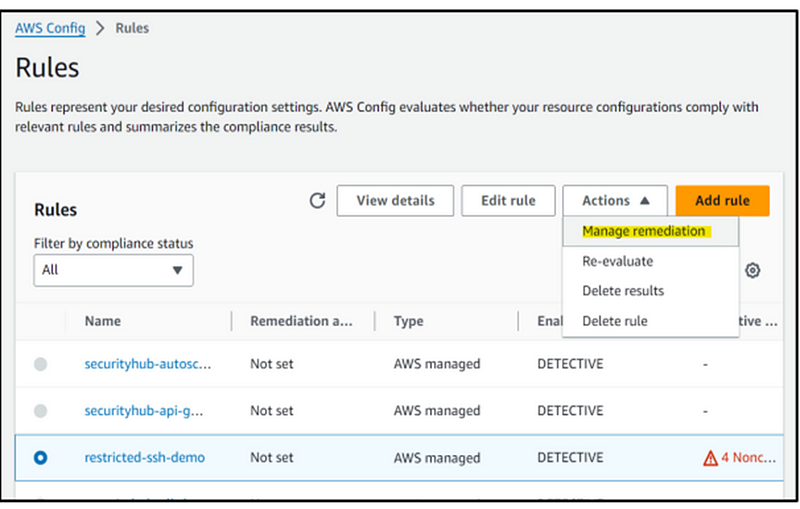
Step 11: Now is the moment to streamline the process by automating the resolution. To accomplish this, revisit the Config Rules and locate the previously established ‘restrict-ssh-demo’ rule. Then, navigate to the ‘Actions’ menu and select the ‘Manage Remediation’ option, following the steps depicted in the screenshot.
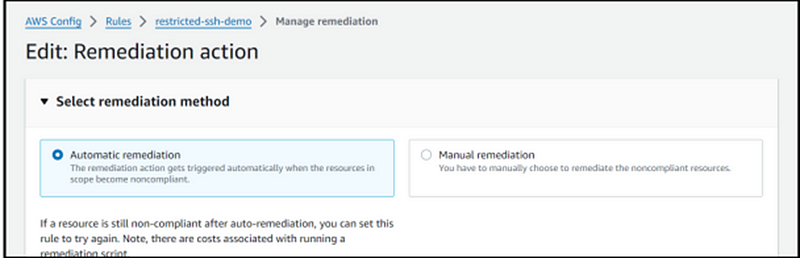
Step 12: Next, choose ‘Automation Remediation,’ as illustrated in the screenshot below.
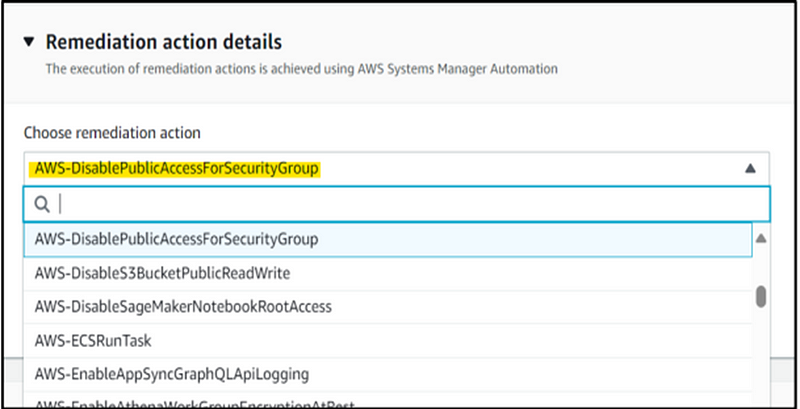
Step 13: Within the ‘Select Remediation Action’ section, choose the remediation action that corresponds to our specific needs. In the context of this demonstration, where our goal is to remove public access to SSH, select ‘DisablePublicAccessForSecurityGroup’ to meet this requirement.
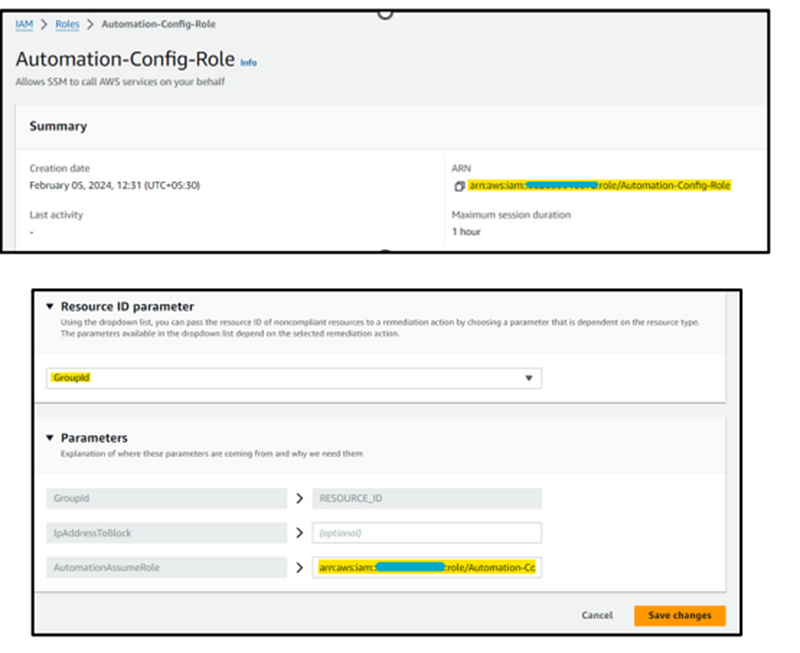
Step 14: Next, in the Resource ID parameter, select the Group ID located in the Automation Assume Role section. Then, copy the Amazon Resource Name (ARN) of the previously created IAM Role and proceed to save the changes.
Step 15: Head back to the configuration dashboard and locate the rule we set up earlier. Navigate to the ‘Resources in Scope’ section, select our demonstration Security Group, and proceed to activate the ‘Remediate’ option. Please note that this process may take a few minutes to complete.
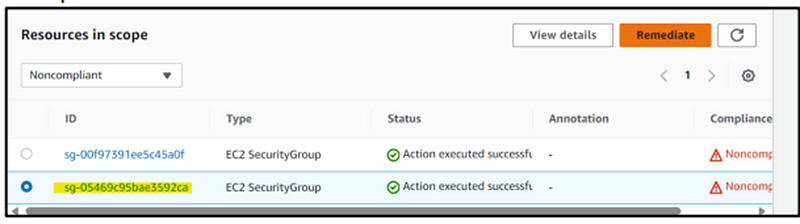
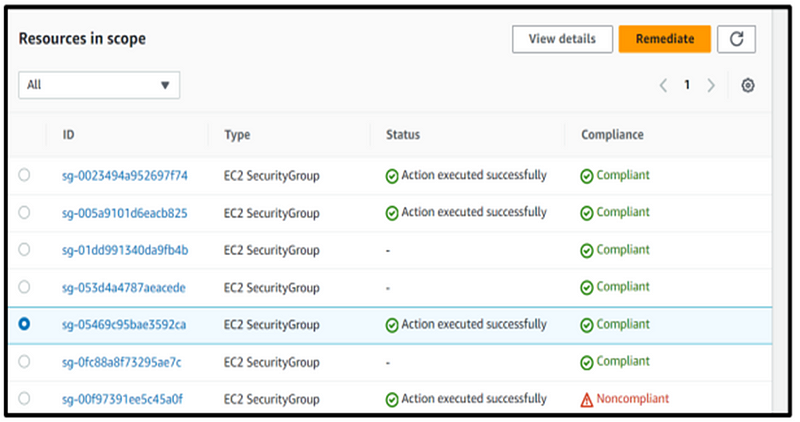
Step 16: Following a short period, the status is promptly updated to indicate the successful execution of the action, along with an update on the compliance status.
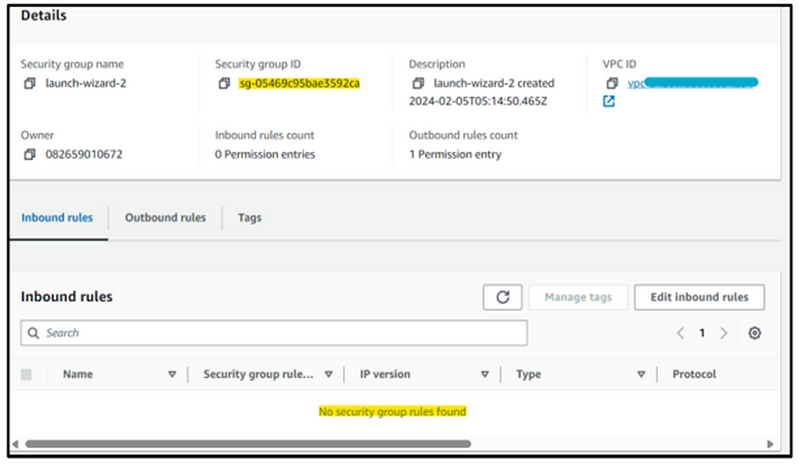
Step 17: Upon performing a manual verification of the previously established Security Group, it becomes evident that public SSH access is not permitted, as depicted in the screenshot below.
Closing Words:
I trust that this blog has provided valuable insights into utilizing Config Rules and SSM Automation Documents to rectify discrepancies within your AWS Account. If you have any questions or require assistance in enhancing the security of your Cloud Services, please do not hesitate to reach out to us. Stay secure and compliant!