Steps:
Introduction:
In this article, we’ll deploy Azure Container Instances for WordPress and MySQL within a private network. We’ll then use a DNAT rule on Azure Firewall to access the WordPress application.
Resources that will be deployed during this process:
- Vnet with four subnets for MYSQL Container Instance, WordPress Container Instance, Azure Firewall, Azure Firewall Management .
- Two Public IP Addresses that will be attached to Azure firewall.
- Network Security Groups for MYSQL and WordPress subnets.
- Azure Firewall
- Route Tables for MYSQL and WordPress Subnets to route traffic to Azure Firewall.
- Azure Container Instances for MYSQL and WordPress using Terraform.
- DNAT rule in Azure Firewall to NAT private IP of WordPress to the above created Public IP.
At first, we will be creating the networking architecture by deploying a Vnet and a Azure Firewall .
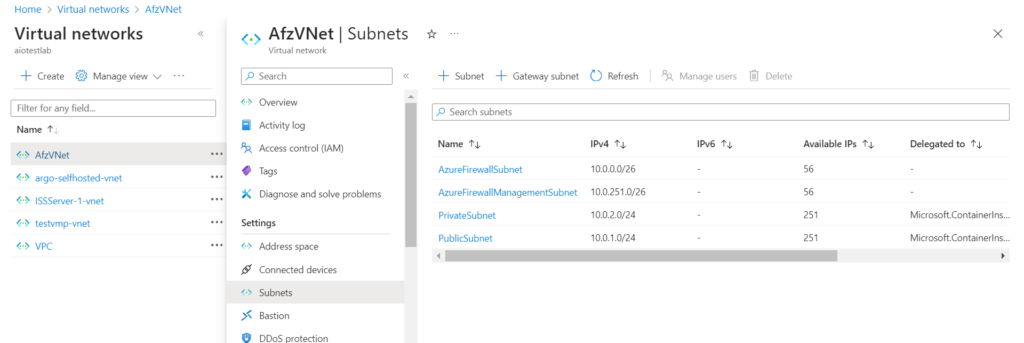
- Create a Vnet and add four subnets to it, as specified below,
I. Private Subnet : MySQL container to be deployed here
II. Public Subnet : WordPress Container to be deployed here
III. Azure Firewall Subnet: Needed during Azure Firewall creation
IV. Azure Firewall Management Subnet : Needed during Azure Firewall creation
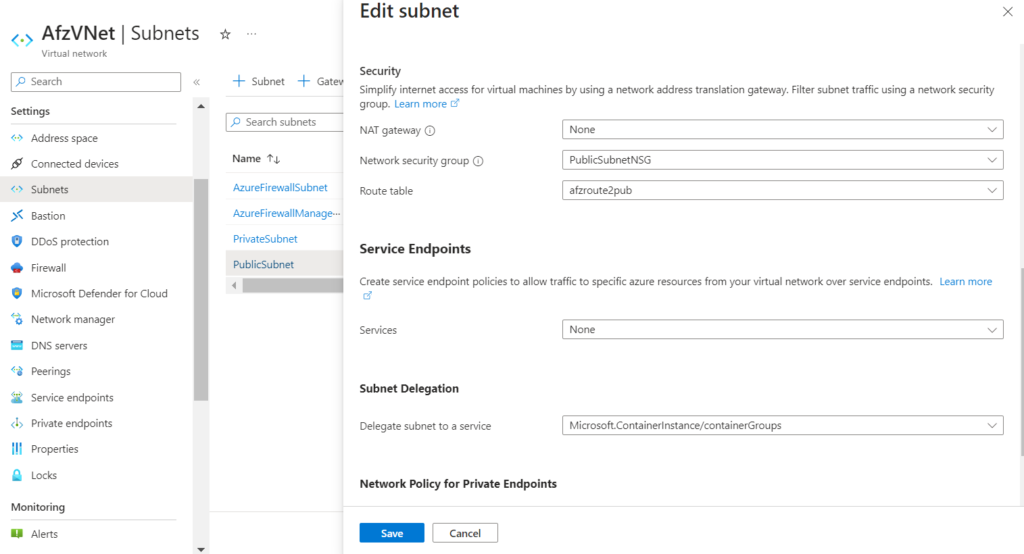
Note: Private and Public Subnets should be delegated to Microsoft.ContainerInstance/containergroups as seen in the below screenshot
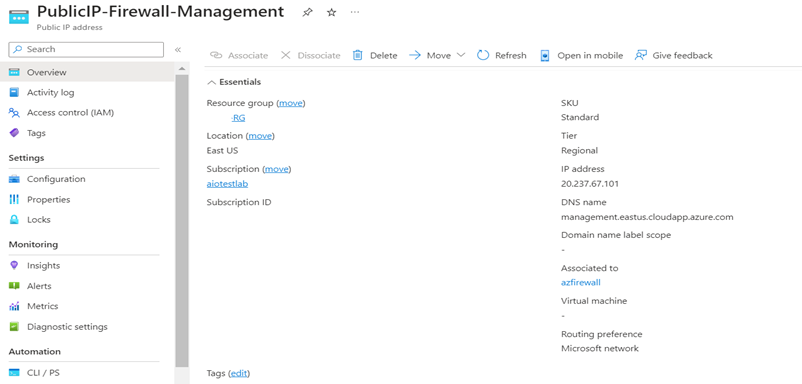
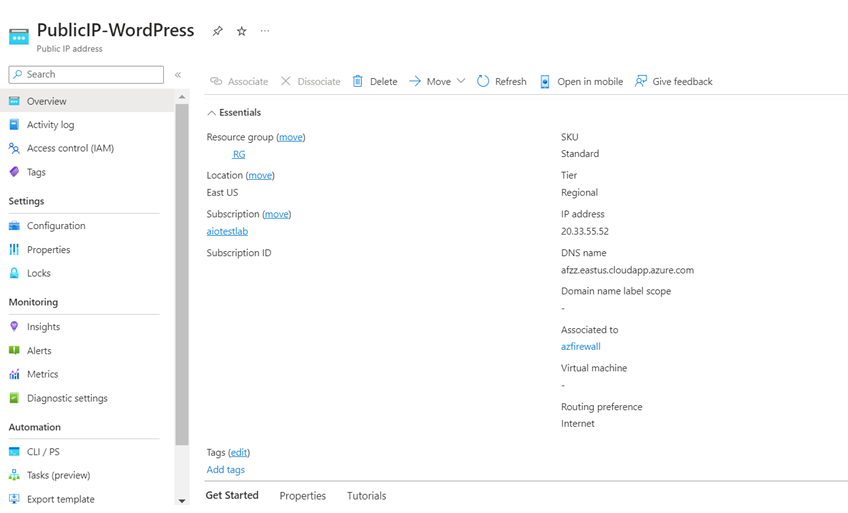
2. Create Two Public IP addresses, these will be used while creating Azure Firewall
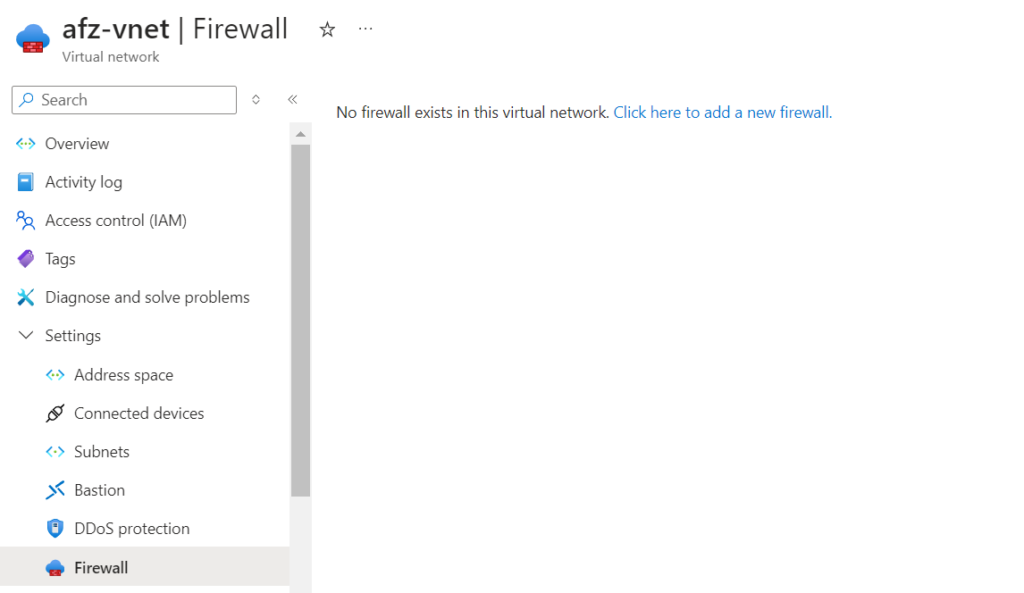
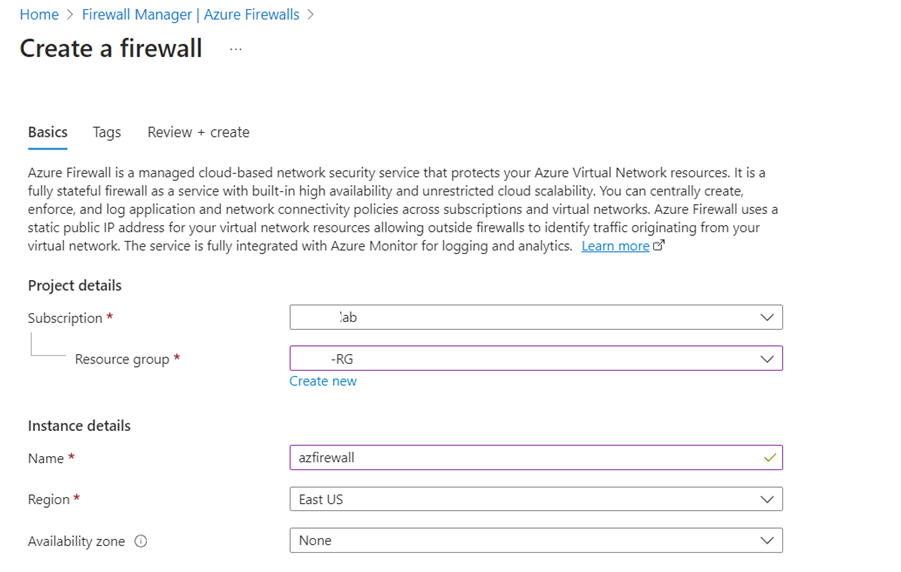
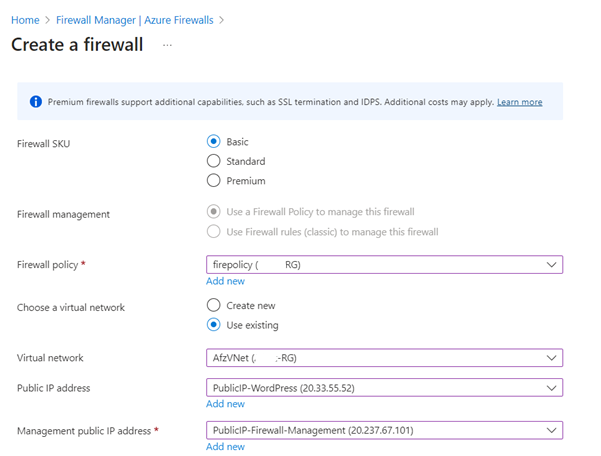
3. Create Azure Firewall in the same Vnet as above, Navigate to Firewall in your Vnet and click on Click here to add a new firewall,
Create new policy and attach the above created Public IP addresses as shown below,
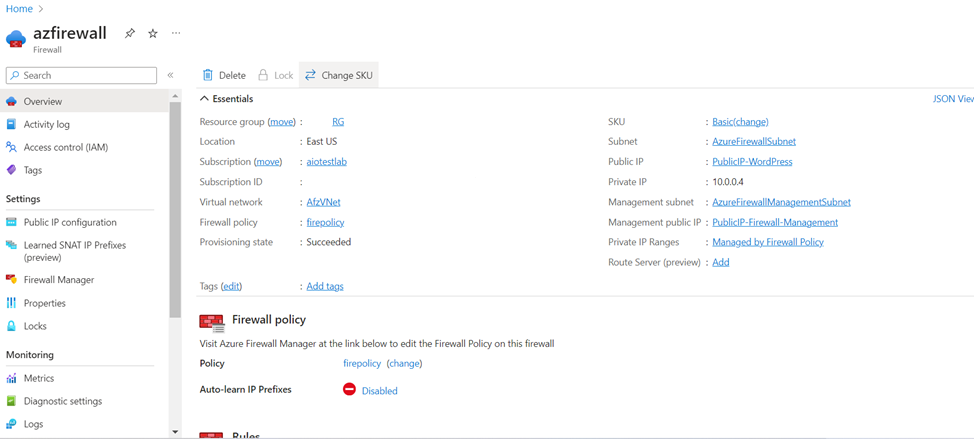
Once the firewall is created you can see that the Firewall is using the two subnets and two public IP addresses we have created in the initial stage,
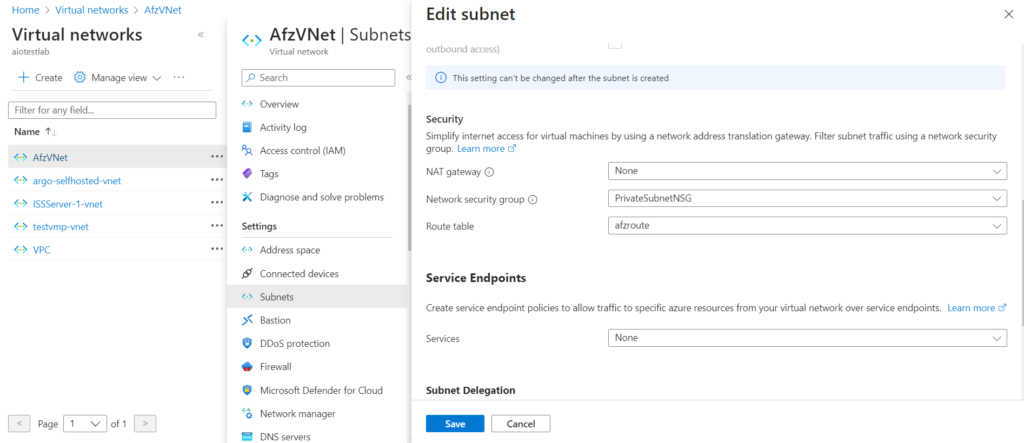
Now, coming back to subnets,
4. The Private Subnet should be associated with a Network Security Group and a Route Table as show below,
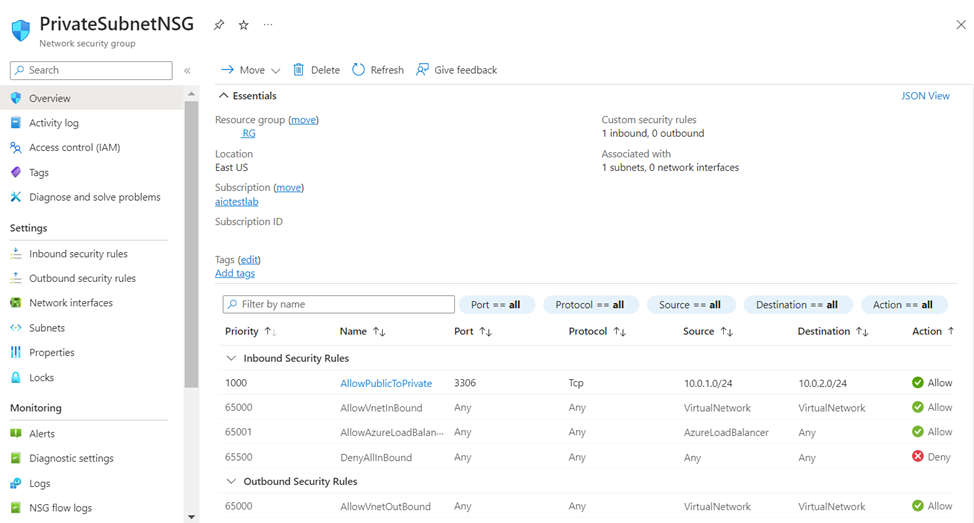
I. Create a Network Security Group with Inbound rule to allow traffic from Public Subnet to Private Subnet and attach it to Private Subnet.
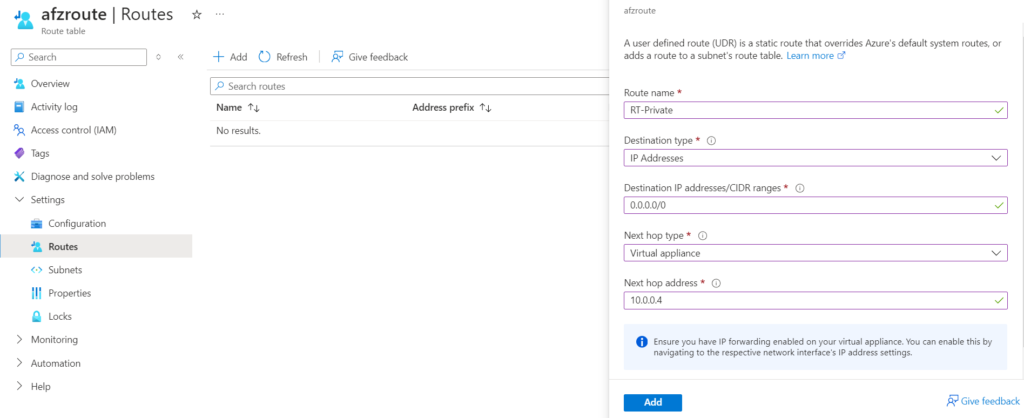
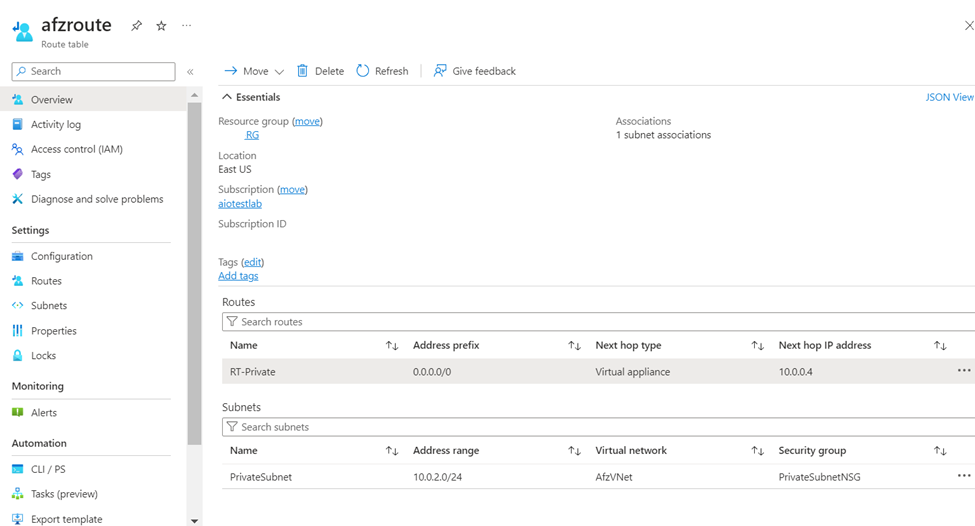
II. Create a Route table with route as shown below and attach it to Private Subnet, Select Next hop type as Virtual Appliance and Next hop IP address is the Private IP of Azure Firewall.
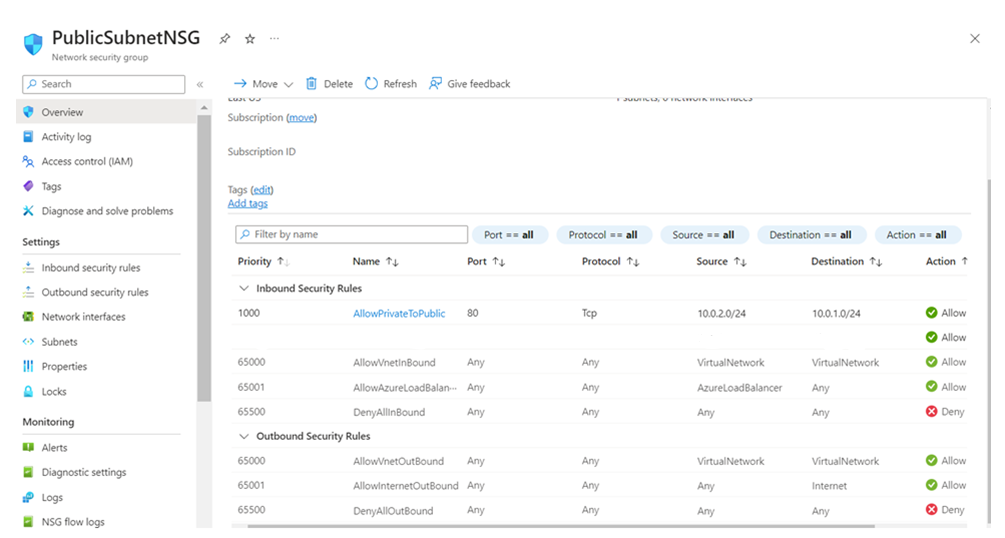
5. Similar to the above Private Subnet, Public subnet should also be attached with a Network Security group and a Route Table,
I. Create NSG with rules to allow traffic from Private Subnet and Azure Firewall and attach it to public subnet
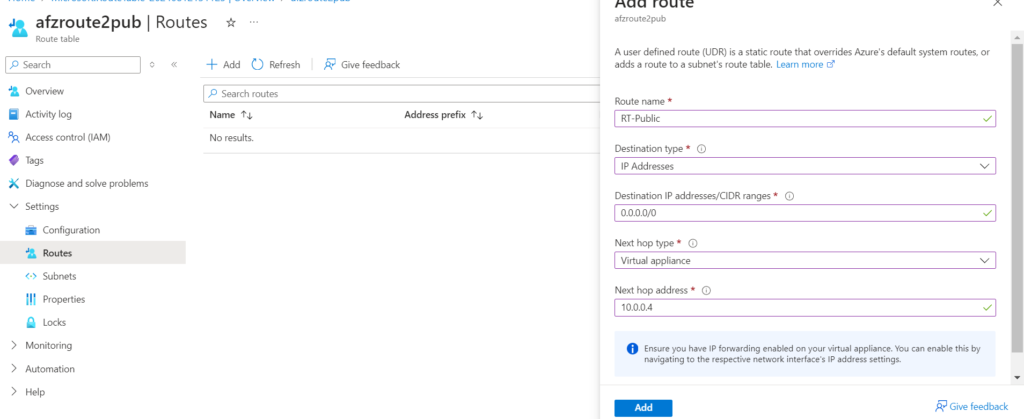
II. Create a Route table with route as shown below and attach it to Public Subnet, Select Next hop type as Virtual Appliance and Next hop IP address is the Private IP of Azure Firewall
Deploying MYSQL and WordPress Containers:
Note: Make sure to push MYSQL and WordPress container images to your azure container registry before creating container instances.
Deploy Mysql and wordpress Container Instances with the following terraform script,
Before running the script run the following commands to set environment variablesyou’re your app registration,
set ARM_CLIENT_ID=<Your app registration client ID>
set ARM_CLIENT_SECRET=<Your app registration client secret>
set ARM_SUBSCRIPTION_ID=<Your Subscription ID>
set ARM_TENANT_ID=<Your Tenant ID>
In the following script make changes to provide your,
- Resource Group Name
- Vnet Name
- Subnets Name
- Azure Container registry login server name, username and password
- Image path with container registry server name
- SQL and wordpress container names (desired)
provider “azurerm” {
features {}
}
resource “azurerm_container_group” “containers” {
count = 2
name = element([“sqlcontainer”, “wordcontainer”], count.index)
location = “East US”
resource_group_name = “<Resource Group>”
os_type = “Linux”
container {
name = element([“mysql”, “wordpress”], count.index)
image = element([“<login server name of your container registry>/mysql:latest”, ” <login server name of your container registry> /wordpress:latest”], count.index)
cpu = “1”
memory = “1.5”
ports {
port = count.index == 0 ? 3306 : 80
protocol = “TCP”
}
}
image_registry_credential {
server = “< login server name of your container registry>”
username = “<Username of your container registry>”
password = “<Password of your container registry>”
}
subnet_ids = [element([data.azurerm_subnet.PrivateSubnet.id, data.azurerm_subnet.PublicSubnet.id], count.index)]
ip_address_type = “Private”
tags = {
environment = “dev”
}
}
data “azurerm_virtual_network” “example” {
name = “<Vnet name>”
resource_group_name = “<Resource Group name>”
}
data “azurerm_subnet” “PrivateSubnet” {
name = “PrivateSubnet”
virtual_network_name = data.azurerm_virtual_network.example.name
resource_group_name = data.azurerm_virtual_network.example.resource_group_name
}
data “azurerm_subnet” “PublicSubnet” {
name = “PublicSubnet”
virtual_network_name = data.azurerm_virtual_network.example.name
resource_group_name = data.azurerm_virtual_network.example.resource_group_name
}
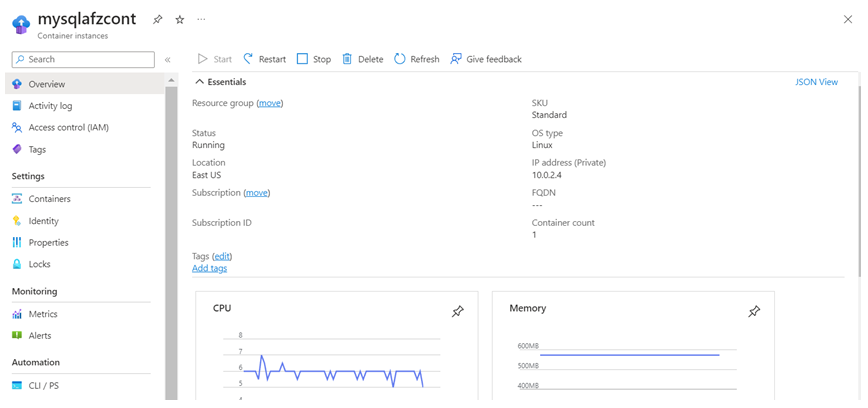
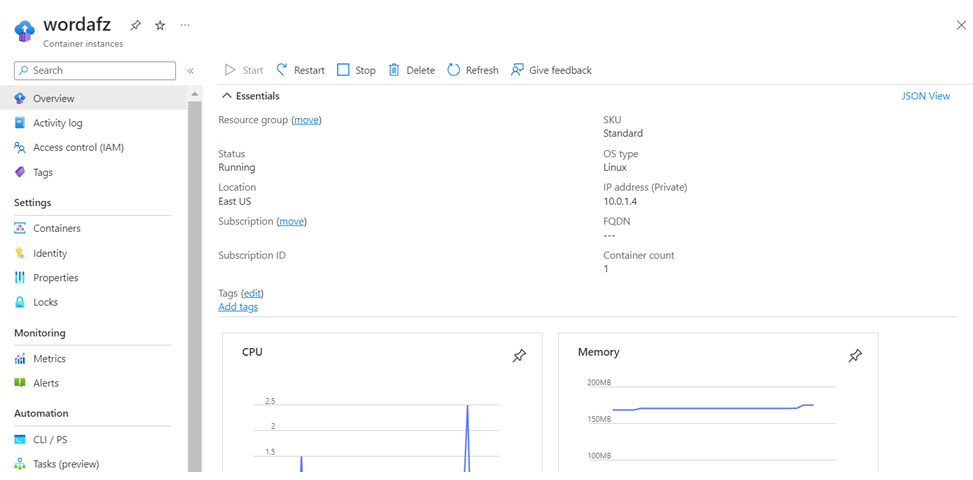
6. By using above script, we can deploy two container instances as seen below,
Connect to the MySQL container to create a database,
Since I have created my containers using the SQL image from the hub, my credentials will be,
Username : root, Password : my-secret-pw
Command to connect to MySQL : mysql -h <IP of MySQL Container> -P 3306 -u root -p
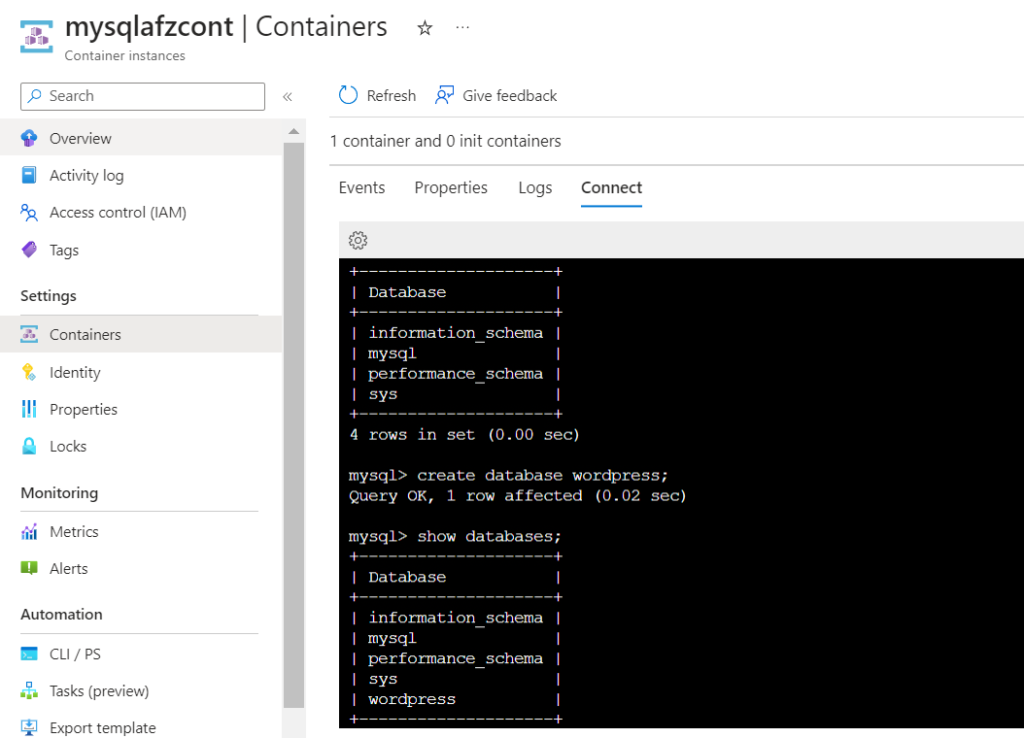
Once entered, it will ask for password, after entering the Password, it will connect to the MySQL,
Create a database as shown below,
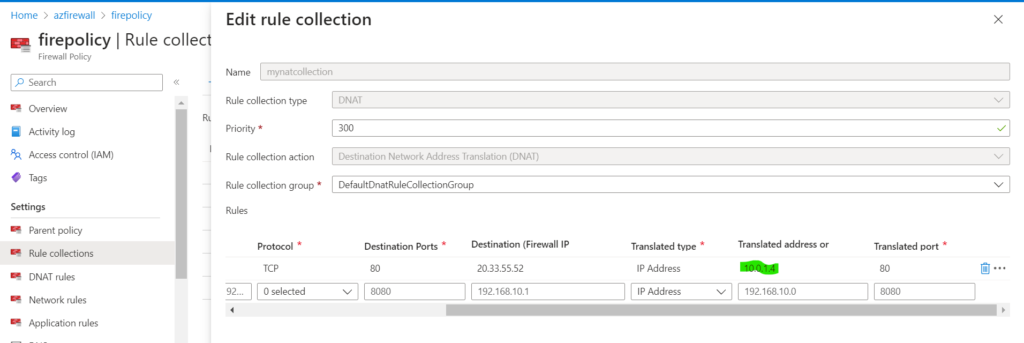
7. Create a DNAT Rule in Azure Firewall,
Destination : Public IP address that we attached to Firewall,
Translated Address : Private IP address of the WordPress Container.
Once the rule is created, you can see the rule collection can be seen as below,
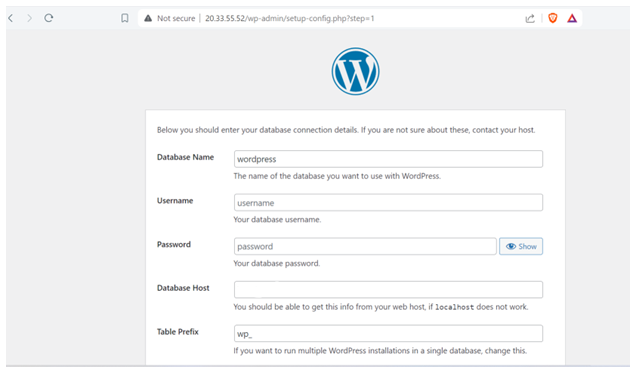
Now, Access the wordpress application by browsing the public IP that we attached while creating DNAT rule.
You will be redirected to wordpress setup config page. Provide the details as follows,
Database : wordpress (which we created in earlier sections)
Username : root
Password : my-secret-pw
Hostname : private IP of the MySQL Container
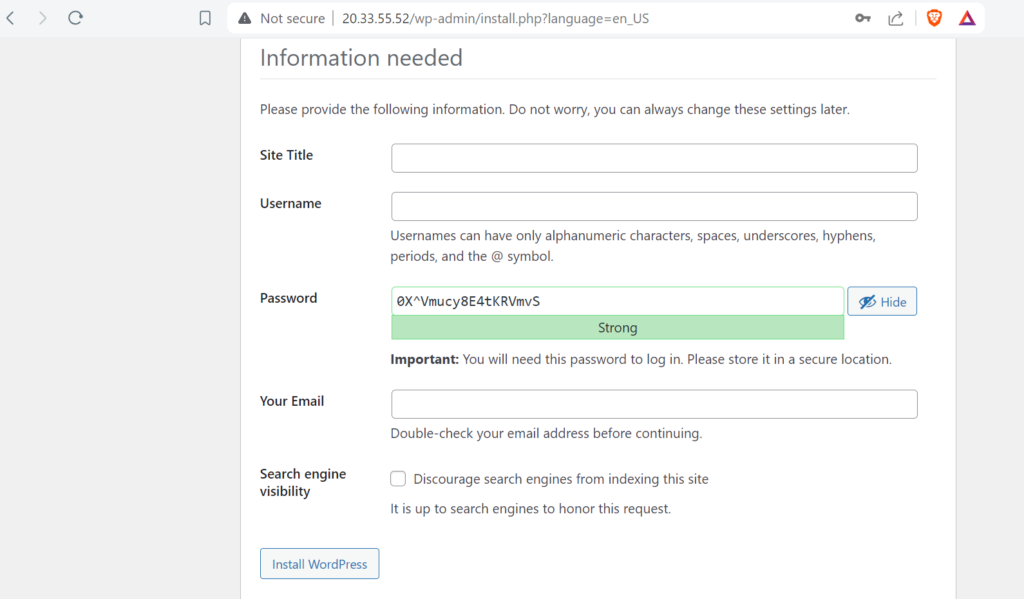
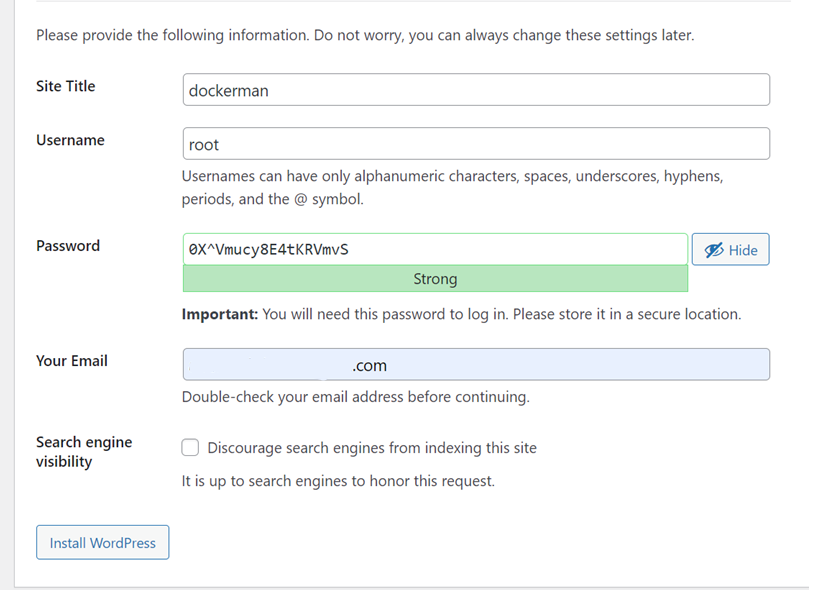
In the Next page, provide desired details and note down the Username and Password and click, Install WordPress.
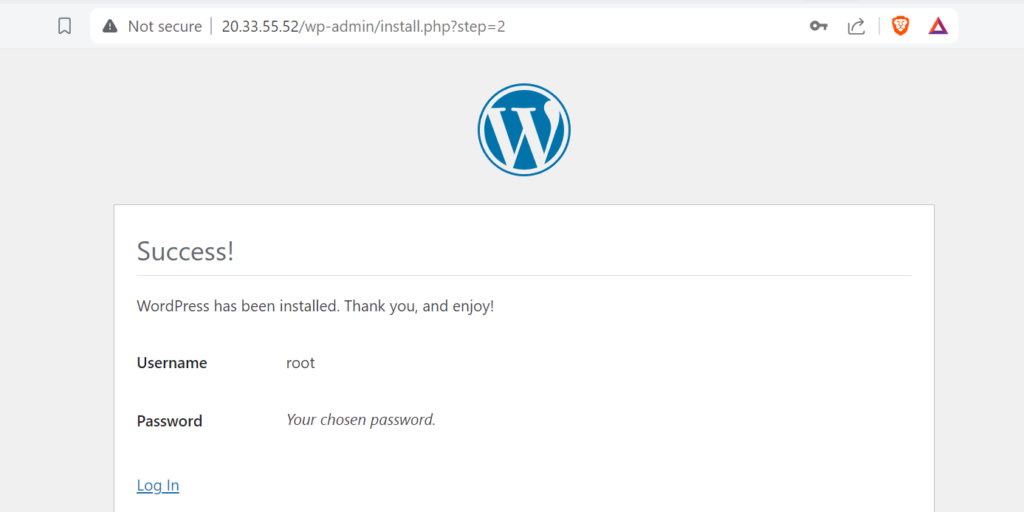
You will see the following page, click on Login and login with the username and password noted above.
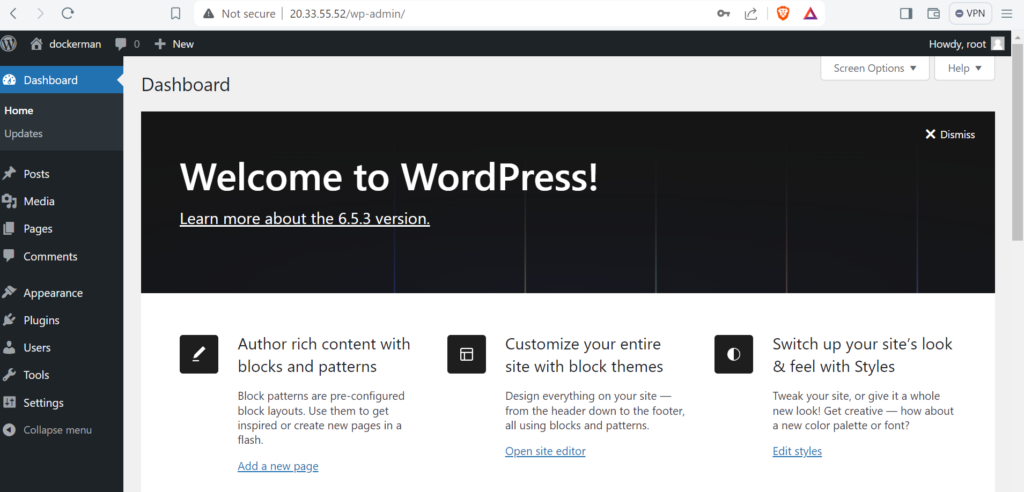
Once you are logged in you will be able to see the wordpress page.
